This recipe was submitted by one of our readers, just like you.
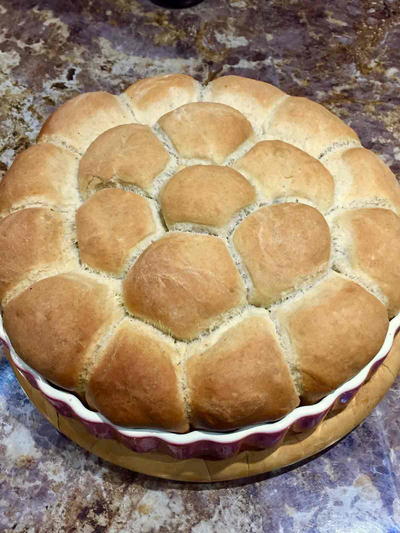
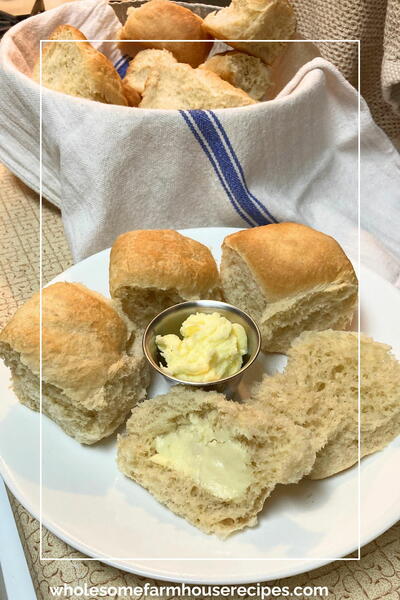
Tear and Share Spelt Flour Buns

Tear and Share Spelt Flour Buns
"I love and truly enjoy making bread. It is in fact my top preference for any baking and I feel it’s the most rewarding work in the kitchen. There’s also the healthy element to consider: homemade bread is way healthier than most breads out there in supermarkets. It contains only what you know very well you have actually put in and no nasty colouring to pretend it’s a healthy whole meal bread, no nasty Es. Just simple and pure bread ?, the real stuff! It tastes so U N I Q U E!!"
NotesBreak it if you want to eat it pretty warm and only cut when it has completely cooled. Personally this never gets too far as it disappears pretty fast.
I also make this and place a camambert cheese in the middle - will post a recipe very, very soon - oh, that is so , so good!
I know you cannot eat this everyday but once in a while - cheese and warm bread - oh, la, la - divine!!
After taking it out of the oven try and not eat straight away but allow it to cool for a at least 15-20 minutes.
Why You'll Love This Recipe
We are absolutely in love with this Tear and Share Spelt Flour Buns recipe! As editors for a recipe website, we are always on the lookout for delicious and wholesome recipes to share with our readers, and this one definitely hits the mark.
Baking bread is truly a labor of love, and there is something so satisfying about creating your own homemade bread from scratch. Not only is it a rewarding experience, but it also allows you to control exactly what goes into your bread. With this recipe, you can rest assured knowing that you are using only the best and freshest ingredients to create a truly delectable treat.
One of the standout features of this recipe is the use of spelt flour. Spelt flour is a healthier alternative to traditional wheat flour, as it is lower in gluten and higher in protein and fiber. This makes it a great option for those looking to incorporate more whole grains into their diet. Plus, the unique flavor profile of spelt flour adds a delicious nuttiness to the buns that sets them apart from your average bread roll.
Not to mention, the tear and share aspect of this recipe adds a fun and communal element to the baking process. Whether you are enjoying these buns on your own or with loved ones, there is something special about breaking off a piece to savor and share.
Overall, this recipe for Tear and Share Spelt Flour Buns is a fantastic choice for anyone looking to elevate their bread baking skills and indulge in a healthier, more wholesome treat. Give it a try - we promise you won't be disappointed!
Serves8
Preparation Time20 min
Cooking Time45 min
Ingredients
- 400 g spelt flour
- 200 g white flour
- 300 ml water (luke warm)
- 2 tsp yeast
- 1 tbsp cane sugar (unrefined)
- 1 tsp himalayan salt (pink)
- 1/4 tsp black pepper (freshly ground)
Instruction
-
In a large bowl mix in the two types of flour, sprinkle the salt and form a well in the middle but try and sprinkle no salt in the actual well as yeast and salt don't like each other. ?
-
In a cup/mug mix the yeast with the sugar and pour 100 ml lukewarm water. Mix well until both sugar and yeast dissolve. You could leave it in the cup or pour it in the well formed in the flour. I recommend the latter as leaving it in the cup requires that you keep an eye on it as it will overflow so, best is to pour it in and set aside for around 20 minutes.
-
Once the yeast has become all a big bubble start kneading the bread. Pour the remainder of the water and the buttermilk and the crushed linseed. Mix very well and knead until the dough no longer sticks to your hand. This will probably take 4-5 min or so.
-
Gradually add the olive oil while still kneading. Feel free with punching, slapping, stretching, whatever you feel like doing with it but as I said the low glutenous flours do not require that much working but maybe half the time (5-6min instead of 10-12 min what would be needed for a higher gluten flour).
-
When finished, smooth the surface into a big ball and cover. Allow to prove for as many hours as you fancy. I normally leave it between 4-8 hrs.
-
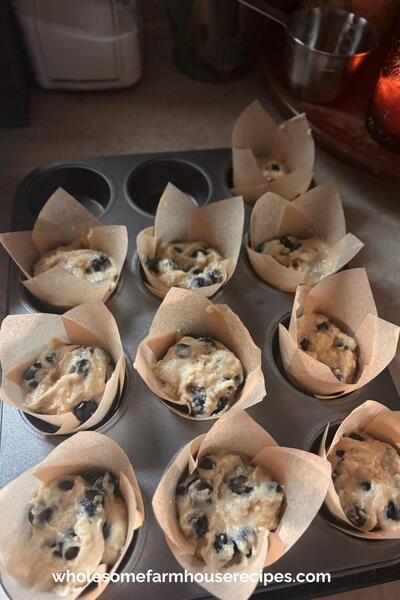
When finished with proving just put into the baking tray. Allow to prove again for an extra hour or so and then place in the oven. Bake at 190 C for 40-50 min.
-
When ready, turn oven off and allow a good 20-30 min to cool.
-
Take out of the oven and cover with a towel for another 20-30 minutes outside the oven. Then, take out from baking tray and serve slightly warm or cold with anything you like, whether that is sweet or savory. Simply divine!